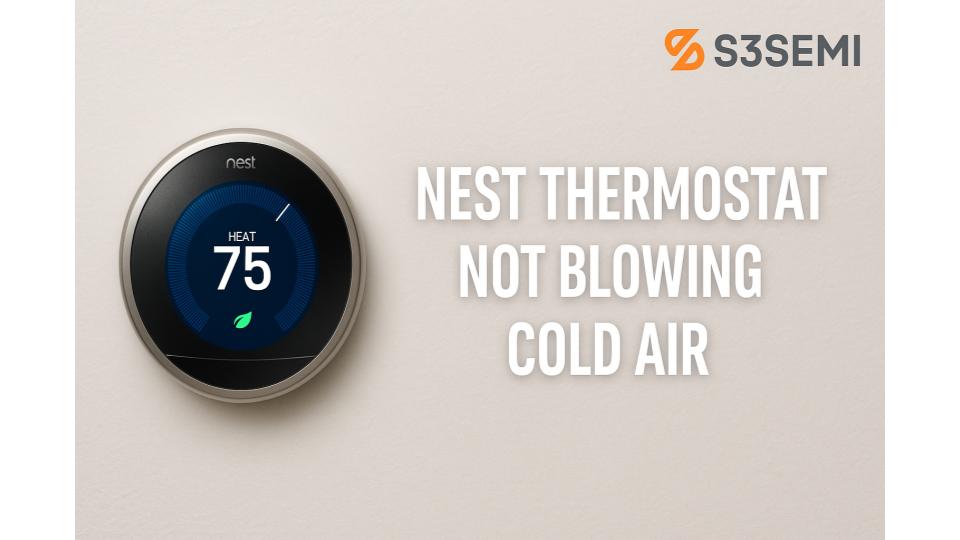
If your Nest thermostat isn’t blowing cold air, you’re not alone. Many homeowners face this issue, especially during the sweltering summer months. A malfunctioning thermostat can turn your home into an uncomfortable space, leaving you desperate for a cool breeze.
Before you panic, there are a few common culprits to consider. From incorrect wiring to dirty air filters, several factors can affect your thermostat’s performance. By understanding these potential problems, you can troubleshoot effectively and restore your home’s comfort.
Let’s dive into the steps you can take to get your Nest thermostat back to blowing that refreshing cold air.
Troubleshooting Nest Thermostat
🕵️♂️ Verify Cooling Mode Selection
Ensure the thermostat is set to Cool mode instead of Heat or Off. This simple step can resolve many issues related to cooling.
🌡 Check Temperature Setpoint
Review the temperature setpoint. Make sure it’s below the current room temperature. If the setting matches or exceeds the room temperature, the air conditioner won’t cool the space.
✔️ Inspect Outdoor AC Unit
Inspect the outdoor AC unit for any signs of power or operation. Ensure the unit is running efficiently and that there are no obstructions blocking airflow. Clear away any debris or plants surrounding the unit.
🧼 Clean or Replace Air Filters
Clean or replace the air filters regularly. Dirty filters can restrict airflow and cause the system to malfunction. Check filters monthly and replace them every 1-3 months based on usage.
🔌 Reset the Thermostat
Perform a thermostat reset by removing it from its base for 30 seconds. This simple action often restores proper functionality.
🔧 Inspect Thermostat Wiring
Inspect the thermostat wiring for loose or damaged connections. Pay special attention to the Y cooling wire, as poor connectivity here often leads to cooling issues.
🔍 Test the HVAC System’s Breaker
Check the HVAC system’s breaker to ensure it’s on. A tripped breaker can prevent the system from receiving power.
🛠 Test Contactors in the Outdoor Unit
Test contactors in the outdoor unit if all previous steps do not resolve the issue. These components control the electrical flow to the compressor. Faulty contactors can lead to cooling failures.
🔄 Factory Reset if Necessary
Perform a factory reset on the thermostat if troubleshooting does not yield results. Follow the instructions in your unit’s manual to return settings to default.
🧑🔧 Consult a Professional
If cooling still fails after following these steps, consult a professional for HVAC diagnostics. Experts can identify complex issues that may not be visible at first glance.
Common Reasons for Lack of Cooling
Several factors can lead to a Nest thermostat not blowing cold air. By understanding these issues, troubleshooting can become straightforward and effective.
🌐 Incorrect Wiring
Incorrect wiring often causes the thermostat to misread signals. First, check if the wires are connected properly. If the connections appear loose or mixed up, label the wires according to the Heat Pump setup instead of the Conventional side. If uncertain about handling the wires, contacting a professional may be the best approach.
🌡️Wrong Temperature Settings
Wrong temperature settings can also make the thermostat fail to cool. First, ensure the thermostat is set to Cool mode. Next, double-check the temperature setpoint. The setpoint must be lower than the current room temperature for the cooling system to activate. Adjusting these settings can lead to immediate results.
🔋Power and Battery Issues
Power and battery issues can disrupt the thermostat’s performance. First, inspect the thermostat’s battery. If the battery is low, replace it. If connected to a C wire, ensure it’s functioning correctly. If cooling problems persist, power cycle the thermostat by turning it off and unplugging it for a few minutes. Replug and turn it back on to see if cooling resumes. Performing these steps may help restore proper functionality.
Step-by-Step Fixes
Discovering why your Nest thermostat is not blowing cold air requires a few straightforward steps. Follow these instructions to troubleshoot the issue effectively.
🔧 Check Thermostat Settings
- Confirm that your thermostat is set to Cool mode. This is essential to ensure your system operates correctly.
- Verify that the temperature setpoint is lower than the current room temperature. If it’s not, adjust it to your desired cooling temperature.
- Ensure the thermostat display responds when adjusted. If it doesn’t, try power cycling the thermostat by turning it off and on.
🔌 Inspect Wiring Connections
- Turn off the power to the thermostat at the breaker box before starting any wiring inspection.
- Remove the thermostat from its base, and check for loose wires, especially the Y cooling wire. Ensure all connections are tight and properly seated.
- Verify that the wires are correctly labeled based on the appropriate wiring configuration. Confirm connections align with the Heat Pump side if applicable.
- If unsure about wiring, utilize the Nest App’s interactive wiring guide to assist in identifying correct connections.
Following these steps can often resolve the issue of your Nest thermostat not blowing cold air. If these do not fix the problem, further investigation or professional help may be necessary.
Examine the Power Source
Power source issues can be a common reason for a Nest thermostat not blowing cold air. Checking these components often helps in resolving cooling problems.
⚡ Check C Wire Connection
Inspect the C wire connection to ensure it’s properly connected. This wire provides continuous power to the thermostat. To check the connection:
- Turn off the power: Always turn off power to your HVAC system at the breaker to avoid any risks.
- Access the thermostat base: Remove the Nest thermostat from its base to see the wiring.
- Locate the C wire: Ensure the C wire is connected securely to the designated connector.
If the C wire is loose or not connected, it can disrupt power, leading to cooling issues.
🔌 Install Nest Power Connector if Needed
If you don’t have a C wire, consider installing a Nest Power Connector. This device helps supply constant power to the thermostat. To install one:
- Turn off the power: As before, turn off the power at the breaker.
- Gather tools: You’ll need a screwdriver and the Nest Power Connector kit.
- Connect wires: Follow the installation instructions provided in the kit to connect the power connectors properly.
- Restore power: Once everything is connected, turn the power back on.
Installing the Nest Power Connector often resolves power-related cooling issues, allowing the thermostat to function correctly.
Maintenance Tips
Regular maintenance helps keep your Nest thermostat working properly. Following these tips ensures your home stays cool when needed.
🌬️ Routine Checks for HVAC System
- Check the Thermostat Settings: Always ensure the thermostat is in Cool mode. Set the temperature lower than the current room temperature.
- Inspect Air Filters: Clean or replace dirty air filters every 1-3 months. Clogged filters reduce airflow and can impact cooling.
- Examine the Outdoor Unit: Look for obstructions like leaves or dirt around the outdoor AC unit. Ensure it is clean and has unrestricted airflow.
- Verify Wiring Connections: Examine the wiring on the thermostat. Ensure all connections, especially the Y cooling wire, are secure and undamaged.
💻 Updating Software and Firmware
- Check for Updates: Regularly check if your Nest thermostat has the latest software. Updates can improve performance and fix issues.
- Accessing Settings: Press the thermostat ring to open the Quick View menu, select Settings, then go to Software. This will indicate if updates are available.
- Performing the Update: If an update is available, follow the on-screen prompts to complete the installation. This process may take a few minutes.
- Factory Reset: As a last resort for persistent issues, perform a factory reset. This clears all settings, so use it only if needed. To reset, go to Settings, select Reset, and follow the instructions.
These maintenance tips will help ensure your Nest thermostat operates efficiently and keeps your home comfortable all summer long.
Troubleshooting Common Issues
Identifying and addressing issues with your Nest thermostat can improve cooling performance. Here are some common problems and their solutions.
⚙️ Device Not Responding
- Check Power Supply: Ensure the thermostat is properly powered. Verify that the HVAC system’s breaker is on.
- Inspect Battery: Confirm the battery is working if your thermostat uses one. Replace it with a new battery as needed.
- Power Cycle the Thermostat: Remove the thermostat from the wall plate for 30 seconds before reattaching it. This may refresh the device.
- Check Wi-Fi Connection: If the thermostat connects to Wi-Fi, confirm that there is a stable connection, as this impacts functionality.
🔄 Fan Running Continuously
- Turn Off the Fan: Access the thermostat settings and switch the fan setting from “On” to “Auto” to avoid constant running.
- Reset the Thermostat: Perform a factory reset by navigating to settings. This can correct fan behavior if settings have been mistakenly adjusted.
- Inspect Wiring Connections: Check connections at the thermostat and HVAC control board for any loose or damaged wires, especially the G wire that controls the fan.
- Swap Wires: If the situation persists, you may swap the G wire and the Y1 wire to see if this resolves the issue, ensuring power is off while you do this.
❗ Thermostat Displaying Error Messages
- Identify the Code: Check the error message displayed on the thermostat. Write down the error code or message for reference.
- Consult the Manual: Refer to the Nest installations guide for explanations of common error codes.
- Update Software: Ensure the thermostat’s software is up to date. Access settings to verify and perform updates if needed.
- Contact a Professional: If resolving the error proves difficult or the device continues malfunctioning, consider consulting an HVAC professional for diagnostics.
By following these steps, I can effectively troubleshoot common issues and help my Nest thermostat work efficiently.
When to Contact a Professional
Sometimes, a Nest thermostat not blowing cold air requires a professional’s help. Recognizing the signs early can save time and ensure comfort.
🔍 Signs of Malfunction Requiring Expert Support
- Incorrect Temperature Readings: If the thermostat displays temperatures that do not match the actual room temperature, professional help is necessary.
- Low Battery Warnings: Receiving repeated low battery alerts after replacing batteries means professional assessment may be needed.
- Wi-Fi Connection Issues: If the thermostat struggles to connect to Wi-Fi consistently, expert support is advisable to troubleshoot the problem.
- Continuous Cooling Failure: If you attempt basic fixes but the thermostat remains unable to cool the home, a professional can diagnose the issue effectively.
- Electrical and Wiring Concerns: Any worries about faulty wiring or potential electrical issues demand immediate professional assistance. Attempting to address these problems without expertise may lead to hazards or more significant damage.
Taking note of these signs helps determine when to seek out a qualified HVAC technician.
Key Takeaways
- Verify Thermostat Settings: Always ensure your Nest thermostat is set to Cool mode and that the temperature setpoint is lower than the current room temperature to initiate cooling.
- Inspect Air Filters: Regularly clean or replace dirty air filters every 1-3 months, as clogged filters can reduce airflow and hinder cooling performance.
- Check Wiring Connections: Look for loose or damaged wiring, particularly the Y cooling wire, to ensure your thermostat is receiving proper signals for cooling.
- Examine the Outdoor Unit: Inspect the outdoor AC unit for obstructions and ensure it is operating efficiently, as issues here can impact overall cooling effectiveness.
- Perform Regular Maintenance: Consistent checks of your HVAC system and software updates for your thermostat can prevent cooling issues and improve functionality.
- Seek Professional Help When Needed: For persistent problems, such as incorrect temperature readings or ongoing cooling failures, consider consulting a qualified HVAC technician for expert diagnostics.
Conclusion
Dealing with a Nest thermostat that won’t blow cold air can be frustrating. By following the troubleshooting steps I outlined, you can often pinpoint the issue and restore your comfort. Remember to check the settings inspect the wiring and keep your air filters clean.
If you’ve tried everything and still face problems it might be time to consult a professional. Early detection of issues can save you time and money in the long run. Keeping your HVAC system well-maintained ensures a cool and pleasant environment all summer long. Stay proactive and enjoy the comfort your Nest thermostat can provide.