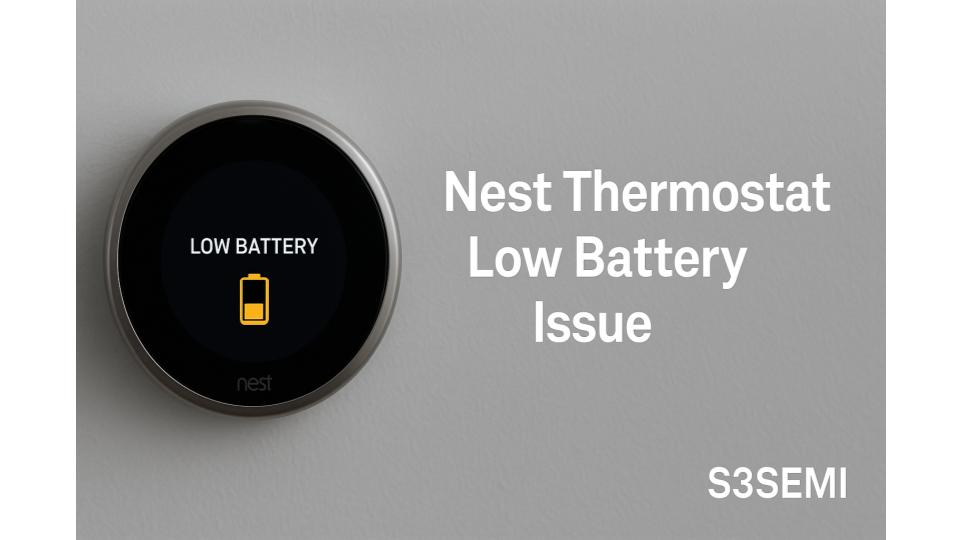
If your Nest thermostat is displaying a low battery warning or has stopped working due to power issues, you’re experiencing one of the most common problems Nest owners face. While Nest thermostats are designed to charge themselves from your HVAC system’s C-wire (common wire), various wiring and power issues can prevent proper charging, leading to battery drain and system failures.
Understanding Nest Thermostat Power Requirements
Nest thermostats contain a rechargeable lithium-ion battery that should maintain charge indefinitely when properly connected to your HVAC system. The thermostat draws power from your heating and cooling wires during normal operation, with the battery serving only as backup during brief power interruptions or when the HVAC system isn’t actively running.
Critical point: Your Nest should never regularly drain its battery if wiring is correct. A persistent low battery warning indicates a power delivery problem, not a defective battery.
Common Causes of Low Battery Issues
1. Missing or Improperly Connected C-Wire
The C-wire (common wire, typically blue) provides continuous 24V AC power to your thermostat and is the most reliable power source. Many older homes lack a C-wire at the thermostat location, even though one may exist at your furnace or air handler.
Symptoms:
- Battery drains within days or weeks
- “Low battery” warning appears regularly
- Thermostat shuts off overnight or when HVAC isn’t running
- Display dims or goes blank
Solution:
- Check if a C-wire exists but wasn’t connected to your old thermostat
- Look for an unused wire in your wall bundle (often blue, but could be any color)
- If a wire exists, connect it to the C terminal on both the Nest base and your HVAC system’s control board
- Label the wire at both ends to identify it as the C-wire
2. Incompatible HVAC System
Some heating systems, particularly older furnaces, high-voltage systems, or certain heat pump configurations, don’t provide adequate power to charge Nest thermostats without a C-wire.
Incompatible systems include:
- Line-voltage (120V/240V) baseboard heaters
- Millivolt systems (gas fireplaces, some older furnaces)
- Systems with proprietary communication protocols
- Some heat pumps without auxiliary/emergency heat wiring
Solution:
- Install a C-wire adapter (Nest Power Connector or third-party option)
- Upgrade to a compatible HVAC system control board
- Consider a different thermostat designed for your system type
3. Insufficient Power from Heating-Only or Cooling-Only Systems
Nest thermostats charge primarily when the HVAC system operates. Homes with separate heating and cooling systems, or those in climates where one system runs infrequently, may not provide enough charging opportunities.
Symptoms:
- Battery drains during shoulder seasons (spring/fall)
- Problem worsens when you’re away and system rarely runs
- Battery charges fine in summer/winter but not between seasons
Solution:
- Install a C-wire or C-wire adapter for continuous power
- Adjust temperature schedules to ensure system runs at least once daily
- Use “Early On” feature to increase system runtime
- Consider adding a C-wire specifically for this issue
4. Weak Transformer or Power Supply
Your HVAC system’s transformer provides 24V AC power. If the transformer is undersized, aging, or failing, it may not supply adequate current to both operate your HVAC equipment and charge your Nest.
Symptoms:
- Low battery warnings appear even with C-wire connected
- HVAC system works but Nest still drains battery
- Voltage at thermostat measures below 20V AC
- Problems worsen when multiple HVAC components run simultaneously
Solution:
- Measure voltage at thermostat terminals using a multimeter (should read 24-28V AC)
- Check transformer rating (should be at least 40VA, preferably 50VA+)
- Replace undersized or failing transformer with higher-capacity unit
- Have HVAC technician verify all control board connections
5. Wiring Problems or Short Circuits
Damaged wires, loose connections, or short circuits can prevent proper power delivery to your Nest thermostat.
Symptoms:
- Intermittent low battery warnings
- Battery drains faster during specific weather or usage patterns
- Thermostat randomly reboots or loses power
- One or more HVAC functions don’t work properly
Solution:
- Inspect all thermostat wiring for damage, fraying, or exposed copper
- Ensure all wire connections are tight at both thermostat and HVAC system
- Check for pinched wires in walls or near furnace
- Test for shorts between wires using multimeter
- Replace damaged wire runs entirely rather than splicing
6. High Power Consumption Accessories
Some HVAC accessories draw significant power through the thermostat wiring, leaving insufficient current to charge your Nest.
Common culprits:
- Zone dampers (multiple zones)
- Humidifiers with 24V solenoid valves
- Power-hungry motorized dampers
- Electronic air cleaners
- UV lights connected to thermostat control
Solution:
- Install C-wire for dedicated thermostat power
- Power accessories directly from HVAC system rather than through thermostat
- Use relay modules to reduce power draw through thermostat wiring
- Upgrade to lower-power accessory models
Immediate Troubleshooting Steps
Step 1: Check Current Battery Level
How to check:
- Open Nest app on your phone
- Select your thermostat
- Tap Settings (gear icon) → Technical Info → Power
- Note the battery voltage (should be 3.6-3.9V when healthy)
- Check Voc (open circuit voltage, should be 24-28V AC)
What the numbers mean:
- Battery voltage below 3.6V indicates charging problem
- Voc below 20V indicates weak power supply
- “Power issue” or “Low power to Rh wire” messages confirm wiring problem
Step 2: Force a Charge Cycle
If your Nest is critically low on battery, manually trigger HVAC operation to charge it:
For heating systems:
- Go to thermostat
- Turn heat on
- Set temperature 5-10°F above current temperature
- Leave running for 2-4 hours
- Check battery level afterward
For cooling systems:
- Turn cooling on
- Set temperature 5-10°F below current temperature
- Leave running for 2-4 hours
- Monitor battery voltage
Critical: This is a temporary solution only. If battery drains again within days, you have a wiring or power supply problem that must be addressed.
Step 3: Perform Power Cycle and Nest Restart
Sometimes software glitches cause false low battery warnings:
Restart from thermostat:
- Press thermostat display to wake it
- Go to Settings → Reset → Restart
- Wait for Nest to reboot (1-2 minutes)
- Check if low battery warning persists
Manual power cycle:
- Remove Nest display from base
- Wait 60 seconds
- Reattach display to base
- Allow Nest to power on and reconnect to WiFi
Step 4: Check for Software Updates
Outdated Nest software can cause battery management issues:
- Open Nest app
- Select your thermostat
- Tap Settings → Software → Update
- Install any available updates
- Restart thermostat after update completes
Long-Term Solutions
Solution 1: Install a C-Wire Adapter (Nest Power Connector)
If your system lacks a C-wire, the Nest Power Connector (included with Nest Thermostat E, sold separately for other models) provides the most reliable solution.
Installation overview:
- Identify R (power) and C (common) terminals at your HVAC control board
- Connect Nest Power Connector between these terminals
- Connect C-wire from thermostat to Power Connector
- Verify thermostat receives adequate power
Alternative C-wire adapters:
- Venstar Add-A-Wire (requires extra wire in bundle)
- Fast-Stat Common Maker (uses existing wires)
- Ecobee Power Extender Kit (compatible with Nest)
Professional installation recommended: C-wire adapters involve working inside your HVAC system. Incorrect installation can damage equipment or create safety hazards.
Solution 2: Run New Thermostat Wire with C-Wire
For permanent, reliable power, running new 18/6 or 18/8 thermostat cable provides the best solution:
When to run new wire:
- Existing wire bundle has fewer than 5 conductors
- Current wiring is damaged or inadequate
- You’re adding new HVAC zones or equipment
- Professional HVAC upgrade is planned
Wire specifications:
- 18-gauge, 6 or 8-conductor thermostat cable
- Minimum 18/5 for basic systems; 18/7 or 18/8 for heat pumps with accessories
- Direct run from thermostat to HVAC system (avoid splices)
Cost: $150-400 for professional installation depending on distance and difficulty
Solution 3: Upgrade HVAC Transformer
If voltage measurements show weak power supply, upgrading your transformer resolves the root cause:
Standard upgrade path:
- Replace 20VA or 30VA transformer with 50VA or 75VA unit
- Ensure transformer matches your system voltage (typically 24V AC)
- Install at HVAC system control board or air handler
- Have HVAC professional verify compatibility
Expected results:
- Stable voltage at thermostat (25-28V AC)
- Faster Nest charging
- Better performance with multiple accessories
Solution 4: Use External USB Power Source (Emergency Only)
As an absolute last resort for incompatible systems, you can power your Nest via USB:
Requirements:
- Micro-USB cable (5V, 1A minimum)
- USB power adapter
- Route cable from nearby outlet to thermostat
Critical limitations:
- Nest cannot control HVAC system on USB power alone
- Must still connect HVAC wires for system control
- Violates Nest’s intended design; not officially supported
- Only for rare incompatible systems where no other option exists
Better alternative: Install a compatible thermostat designed for your HVAC system rather than forcing Nest to work on USB power.
Preventive Measures and Best Practices
Optimize Nest Settings for Battery Life
Even with proper wiring, certain settings affect charging patterns:
Recommended settings:
- Enable “Early On” (Settings → Nest Sense → Early On)
- Use “Auto-Schedule” to ensure regular HVAC operation
- Set “Home/Away Assist” for appropriate temperature setbacks
- Avoid extremely narrow temperature deadbands (use 2-3°F minimum)
Screen brightness:
- Reduce screen brightness in Settings → Display → Brightness
- Lower brightness reduces power consumption slightly
- Set “Auto-Brightness” for optimal balance
Monitor Power Health Regularly
Monthly checks:
- Review Technical Info → Power in Nest app
- Verify Voc stays 24-28V AC
- Check battery voltage remains 3.6-3.9V
- Note any “Power issue” messages
Set up alerts:
- Nest app notifications for low battery warnings
- Email alerts for system errors
- Monthly reminders to check power readings
Seasonal Considerations
Spring and fall challenges:
- HVAC systems run less frequently
- Battery may drain during mild weather
- Consider running fan occasionally to charge battery
- Monitor battery level more closely during shoulder seasons
Temperature setpoints:
- Avoid scheduling long periods with no HVAC operation
- Set wider Home/Away differentials to ensure daily system runtime
- Use “Eco Temperatures” feature for energy savings while maintaining charging
When to Call a Professional
Immediate professional help needed if:
- You smell burning odors near thermostat or HVAC system
- HVAC system doesn’t respond to thermostat at all
- Multiple error messages appear beyond just low battery
- You’re uncomfortable working with electrical systems
- System has high-voltage components (240V baseboard heat, etc.)
Professional assessment recommended for:
- Persistent low battery despite troubleshooting attempts
- Installing C-wire or C-wire adapter
- Upgrading transformers or control boards
- Complex systems with multiple zones or accessories
- Verifying system compatibility before Nest installation
Nest Model-Specific Considerations
Nest Learning Thermostat (3rd Generation)
Power requirements:
- 20mA minimum when calling for heat/cool
- 100mA for WiFi operation and charging
- Most reliable with C-wire connection
- Can work without C-wire on some systems but not recommended
Nest Thermostat E
Power features:
- Includes Nest Power Connector in box
- Designed for easier installation without C-wire
- Lower power consumption than Learning Thermostat
- Better suited for systems without C-wire but still works best with one
Nest Thermostat (2020)
Power characteristics:
- Most energy-efficient Nest model
- Simplified design with lower power consumption
- Still requires adequate 24V power source
- C-wire strongly recommended for reliable operation
Understanding Battery Replacement (Usually Unnecessary)
Important: Nest batteries are not user-replaceable and rarely fail. If you have persistent low battery issues, the problem is power delivery, not a bad battery.
Battery replacement only needed if:
- Thermostat is 5+ years old with confirmed battery degradation
- Battery voltage never exceeds 3.6V even after 24 hours charging
- Professional diagnosis confirms battery failure
- All power delivery issues have been ruled out
Replacement process:
- Requires professional service or return to Google/Nest
- Not covered under standard warranty after 2 years
- Costs $50-100 for battery replacement service
- DIY replacement voids warranty and risks damaging thermostat
Conclusion
Nest thermostat low battery issues are almost always caused by inadequate power delivery from your HVAC system rather than battery failure. The most reliable long-term solution is installing a proper C-wire connection, either by using an unused wire in your existing bundle, installing a C-wire adapter like the Nest Power Connector, or running new thermostat cable.
For immediate relief, force a charge cycle by running your HVAC system for several hours, but understand this is only temporary. Measure the voltage at your thermostat terminals—readings below 20V AC indicate a weak power supply requiring transformer upgrade or wiring improvements.
Avoid relying on temporary solutions like frequent charging cycles or USB power adapters. Instead, invest in proper wiring or C-wire adapters to ensure your Nest thermostat receives consistent, reliable power for years of trouble-free operation. When in doubt, consult an HVAC professional to diagnose power issues and recommend the best solution for your specific system configuration.