
I bought my first oscilloscope thinking any cheap model would work for Arduino projects. Three frustrating weeks later, I discovered why my $80 scope couldn’t capture fast digital signals. After testing beginner scopes, here’s what actually matters when choosing your first oscilloscope and what’s just marketing hype.
Summary of Top Picks
- FNIRSI 1014D Oscilloscope
- FNIRSI DSO-510 Handheld Oscilloscope
- FNIRSI 2C53T Handheld Oscilloscope
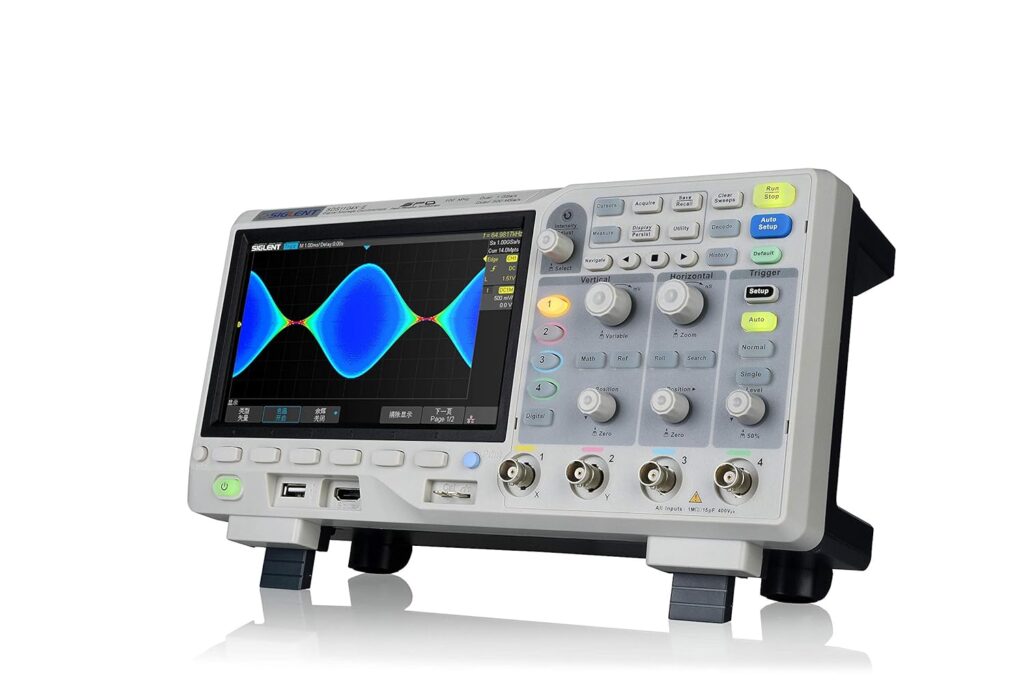
- Siglent SDS1104X-E
- Siglent SDS1202X-E
🏷️ Oscilloscope Deals ⭐⭐⭐⭐
Overview
For beginners, an entry-level oscilloscope provides the core functionality needed to learn signal analysis without the complexity and cost of professional-grade equipment. These models typically offer basic features like dual-channel inputs, sufficient bandwidth for common applications, and straightforward controls that help new users understand fundamental concepts. Digital storage oscilloscopes have become the standard choice because they capture and display signals more clearly than older analog models while offering useful features like automated measurements and waveform storage.
What to Look For
When selecting a beginner oscilloscope, bandwidth and sample rate are the most critical specifications to consider. Bandwidth determines the range of signal frequencies the oscilloscope can accurately measure, while sample rate affects how detailed the captured waveform appears. Screen size and display quality also matter for comfortable viewing, and the number of channels determines how many signals you can observe simultaneously. I researched and evaluated numerous entry-level oscilloscopes to identify the models that offer the best combination of essential features, ease of use, and value for those new to signal analysis.
Best Oscilloscopes for Beginners
I’ve carefully evaluated the top oscilloscopes designed for those just starting their electronics journey. My selections prioritize ease of use, educational value, and reliable performance at entry-level price points.
FNIRSI 1014D Oscilloscope
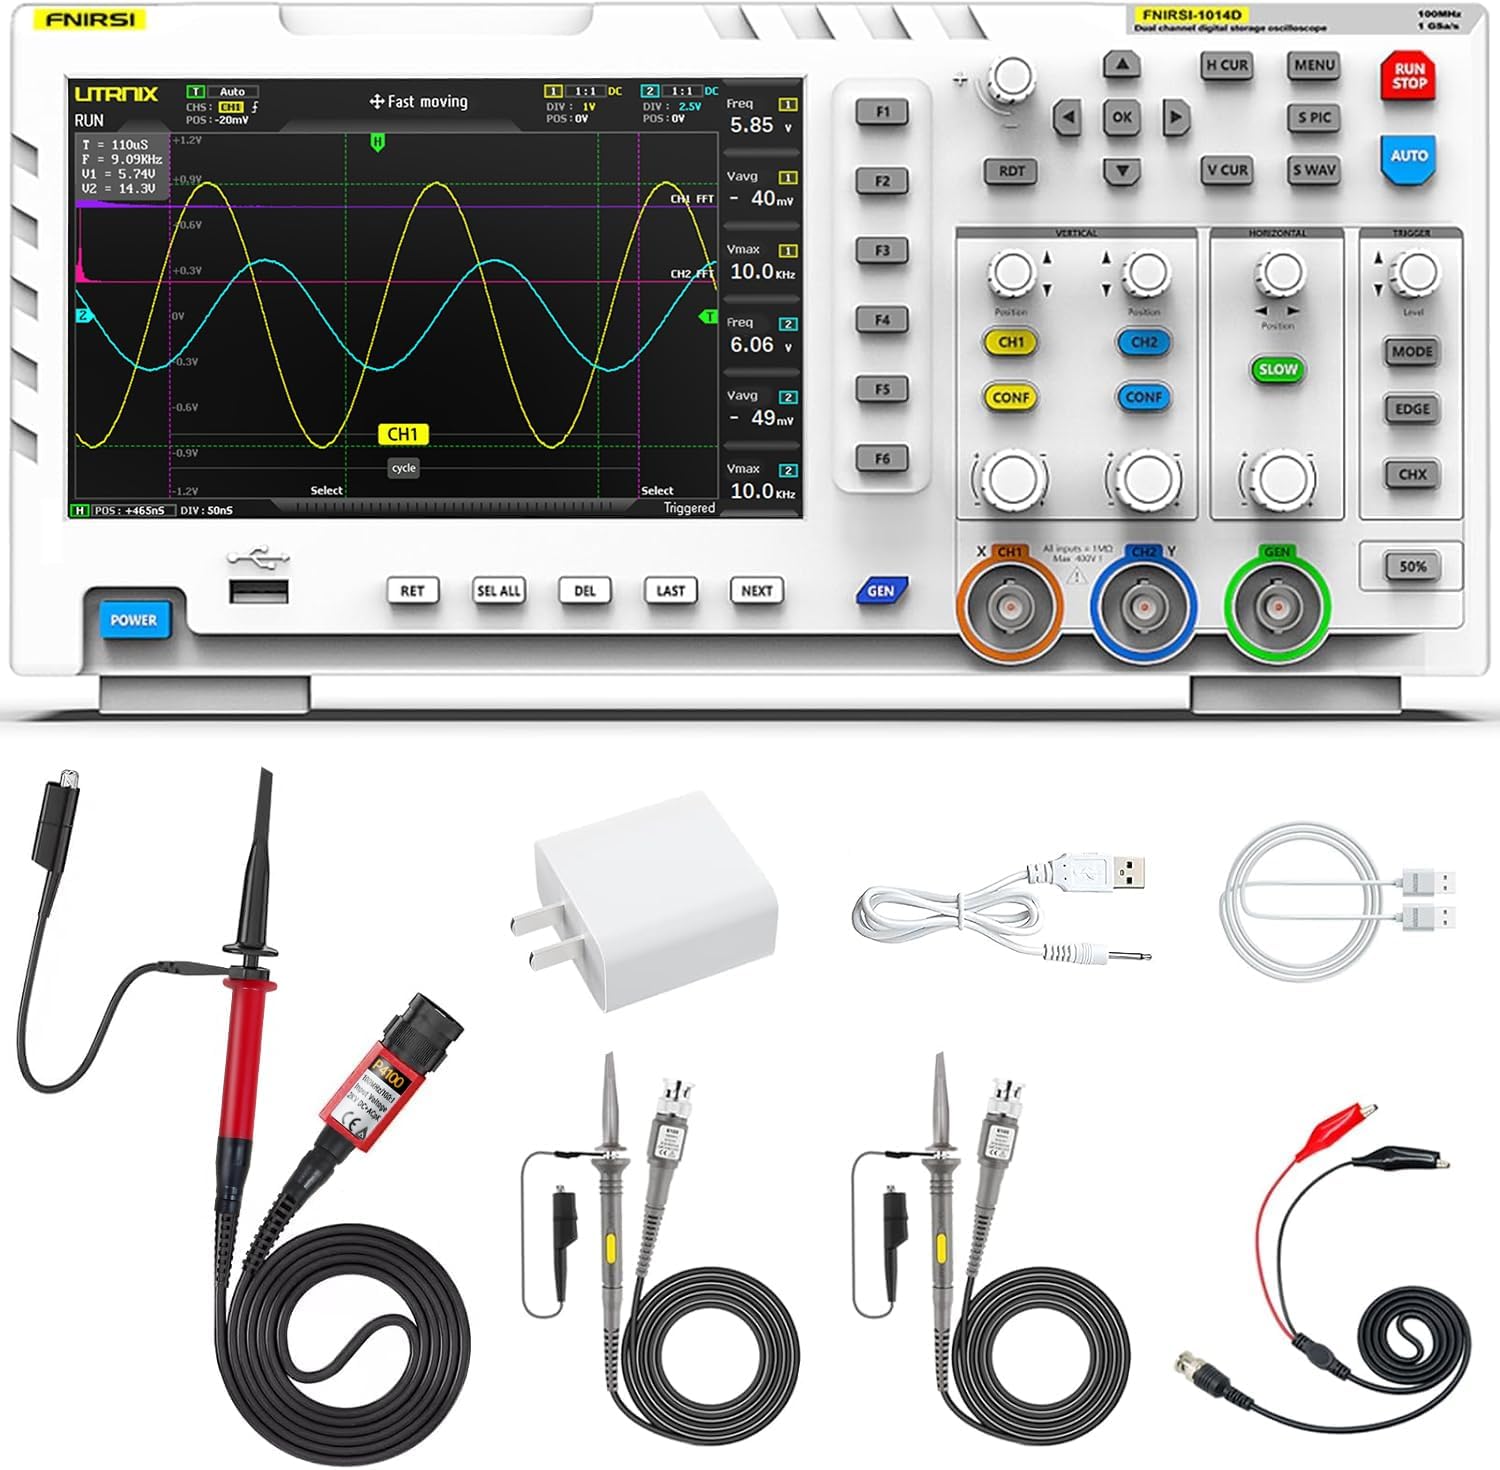
This dual-channel oscilloscope offers solid value for beginners who need reliable signal analysis without spending thousands on professional equipment.
Pros
- The 7-inch display with 800×480 resolution makes waveforms easy to read without squinting at tiny details
- Built-in signal generator adds versatility for testing circuits without needing separate equipment
- Auto setup feature quickly locks onto signals, saving time during initial measurements
Cons
- The trigger settings require patience to dial in correctly beyond the auto mode
- Signal generator output is limited to 10MHz for sine waves and 2MHz for square waves
- Interface takes some getting used to before operations feel natural
I found the 1GSa/s sampling rate handles most beginner projects without issues. The cursor measurement function eliminated the tedious counting of grid squares that I dealt with on older scopes. When I tested audio circuits and basic digital signals, the bandwidth proved adequate for diagnostic work.
The FFT function gave me a quick look at harmonic content, which helped when troubleshooting distortion problems. I appreciated the 1GB storage space for saving waveforms to compare later. The included 100X high voltage probe expanded my measurement range beyond what the standard probes could handle.
Setting up triggers manually took more effort than expected. The auto trigger worked well for stable signals, but capturing one-shot events required adjusting the trigger level and mode carefully. Once I learned the menu system, switching between functions became faster.
The dual-channel capability let me compare input and output signals simultaneously during amplifier testing. The Lissajous mode is useful to check phase relationships between signals. The DDS signal generator proved useful for injecting test tones, though I wished the frequency range extended higher for RF work.
Build quality feels acceptable for the price point. After several months of regular use on my workbench, the unit continues functioning as expected. The screen remains responsive, and the buttons haven’t developed any issues.
FNIRSI DSO-510 Handheld Oscilloscope
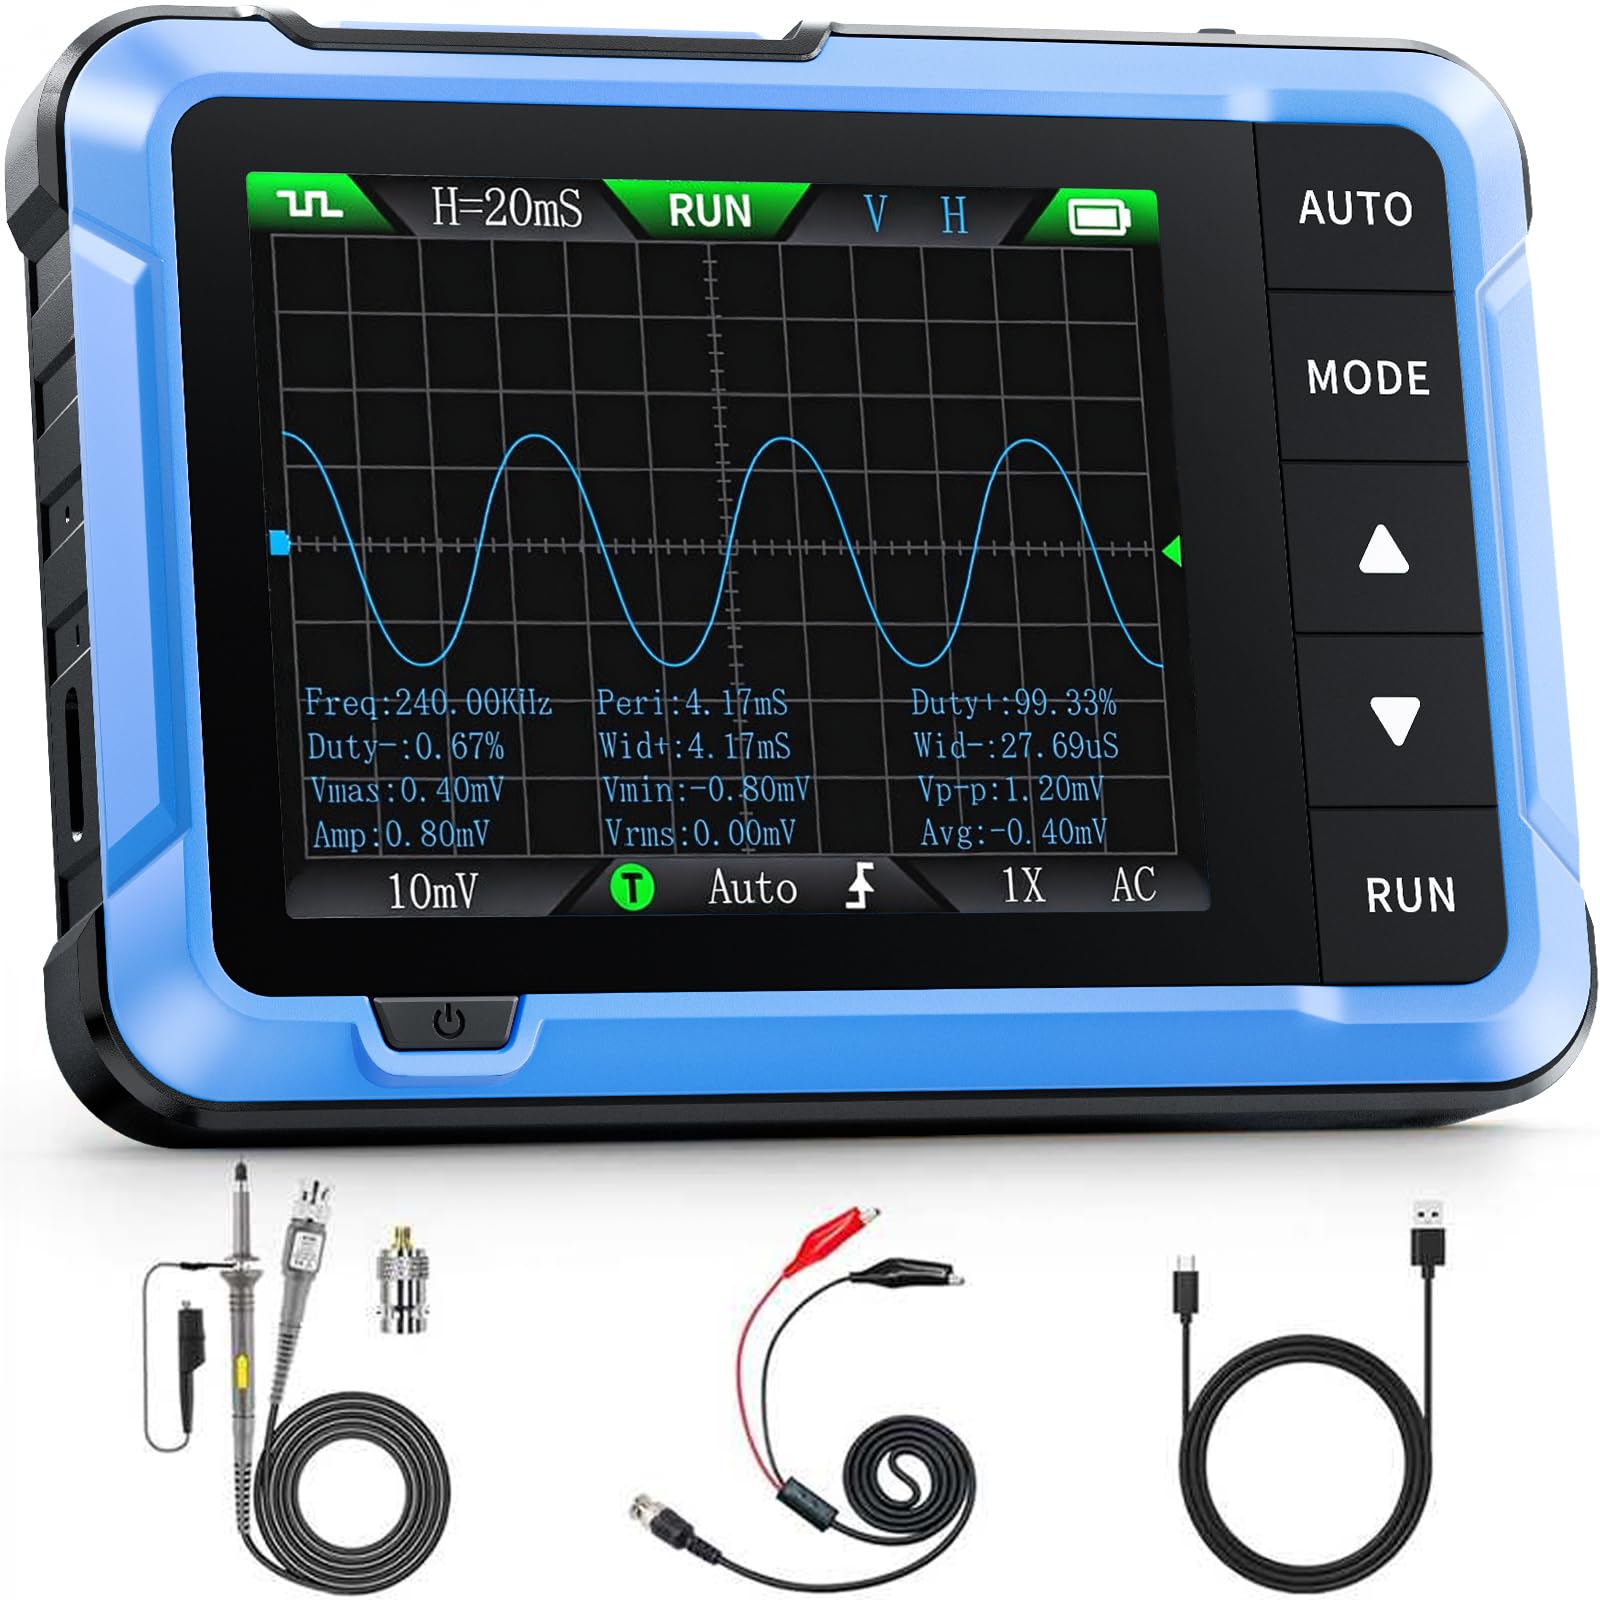
This compact scope delivers solid performance for basic troubleshooting and learning, though you’ll need patience to master its interface and accept its limitations at this price point.
Pros
- The built-in DDS signal generator with 13 waveform types eliminates the need for separate testing equipment
- Compact size and rechargeable battery make it practical for automotive work and field testing
- One-key AUTO function quickly optimizes settings for beginners still learning measurement parameters
Cons
- The probe’s 1x and 10x attenuator switch doesn’t affect the input signal as it should
- Controls and menu navigation take considerable time to learn and aren’t intuitive at first
- Single channel limits more complex signal comparison work
The FNIRSI DSO-510 is surprisingly capable for its compact form factor. The 2.8-inch display shows waveforms clearly enough for basic analysis, and I appreciated the infinite afterglow feature when trying to capture intermittent signals. The 10 MHz bandwidth handles most beginner and hobbyist applications without issue.
Taking this scope to diagnose car audio systems proved its portability advantage. I didn’t need to drag out a bench scope or hunt for an outlet. The 1000mAh battery lasted through several testing sessions, and Type-C charging means I could top it off with the same cable I use for my phone.
The signal generator functionality adds genuine value beyond basic oscilloscope duties. I used it to inject test signals up to 50 kHz, which covered my needs for troubleshooting analog circuits. Having both measurement and signal generation in one pocket-sized unit streamlines basic electronics work.
However, I noticed the attenuator switch issue that other users reported. When measuring higher voltage signals, I had to mentally compensate since the probe switch didn’t function properly. The interface also demands patience during the learning curve, as button combinations aren’t always obvious.
For the price I got a functional scope that handles periodic analog signals and digital waveforms adequately. It won’t replace a professional bench oscilloscope for precision work, but it fills the gap when you need quick measurements or portable diagnostics. Just remember you’re working with entry-level accuracy and plan accordingly.
FNIRSI 2C53T Handheld Oscilloscope
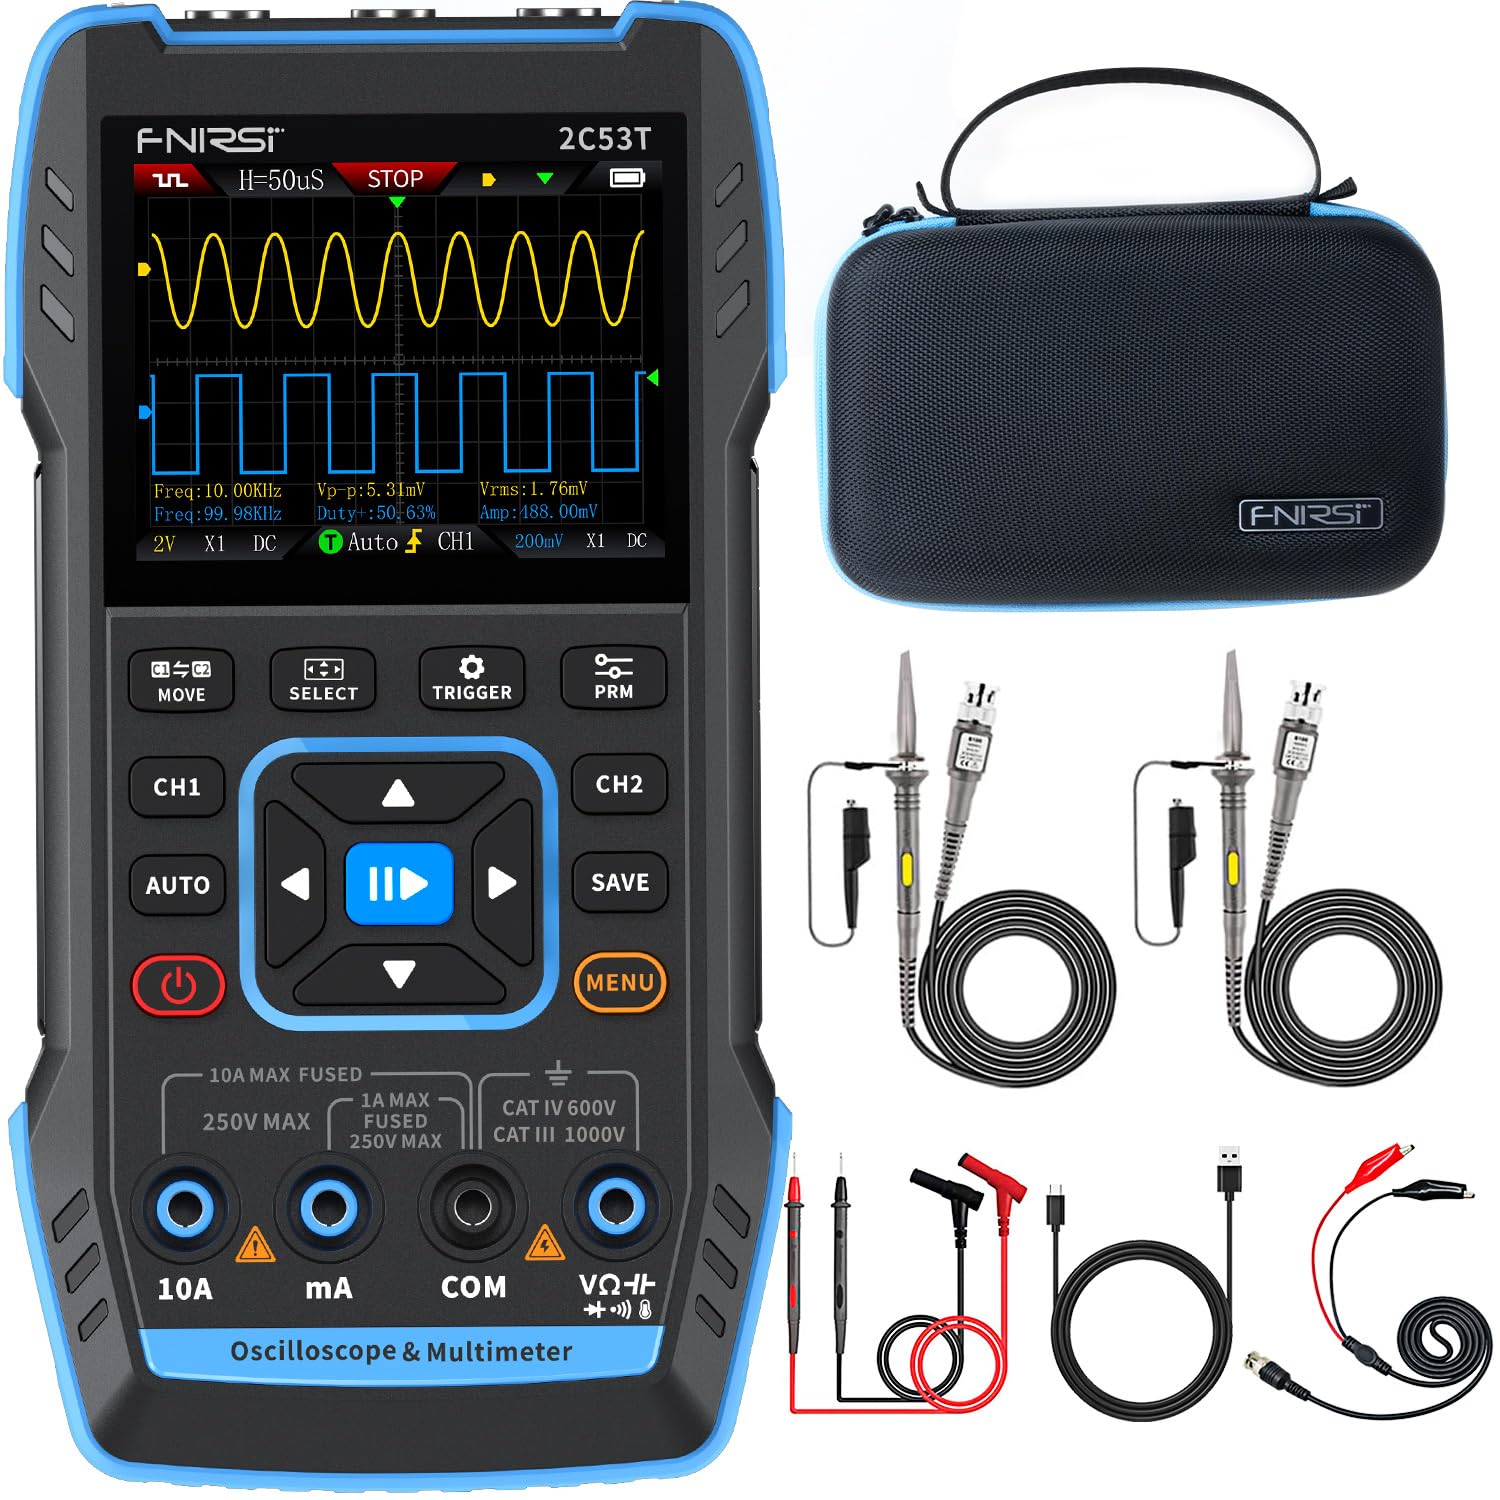
This three-in-one device delivers solid value for beginners who need basic oscilloscope functions combined with a multimeter and signal generator without spending several hundred dollars.
Pros
- Combines oscilloscope, multimeter, and signal generator in one compact unit with a protective case
- Built-in 3000 mAh battery provides around 6 hours of runtime for portable troubleshooting work
- Automatic measurement mode simplifies signal analysis for users still learning oscilloscope basics
Cons
- Limited 50 MHz bandwidth and 250 MSa/s sampling rate restrict use to hobbyist applications
- Adjustment options feel constrained compared to dedicated bench equipment
- Battery drains quickly during extended sessions, requiring frequent charging
The FNIRSI 2C53T is surprisingly capable for checking basic waveforms and testing circuits on my workbench. The 2.8-inch display shows signals clearly enough for most beginner projects, though I sometimes wished for more screen real estate when comparing two channels simultaneously.
Having a multimeter built into the same housing proved more useful than I expected. I could measure DC voltage on a power supply, then immediately switch to oscilloscope mode to check for ripple without grabbing another tool. The 19999 count resolution on the multimeter handles standard troubleshooting tasks without issues.
The signal generator outputs 13 different waveforms up to 50 kHz, which covers common testing scenarios for audio circuits and basic digital projects. I appreciated the 1 Hz step adjustment when dialing in specific frequencies. The probes included in the case work adequately, though serious users might want to upgrade them eventually.
Running auto calibration at startup improves accuracy noticeably. The Type-C charging interface makes powering up convenient since I already keep those cables around my workspace. Saving waveforms to review later helped me compare circuit behavior before and after modifications.
This device suits hobbyists and students learning electronics fundamentals. I wouldn’t rely on it for precision calibration work or high-frequency applications, but it handles the majority of beginner oscilloscope tasks competently at a fraction of traditional scope pricing.
Siglent SDS1104X-E
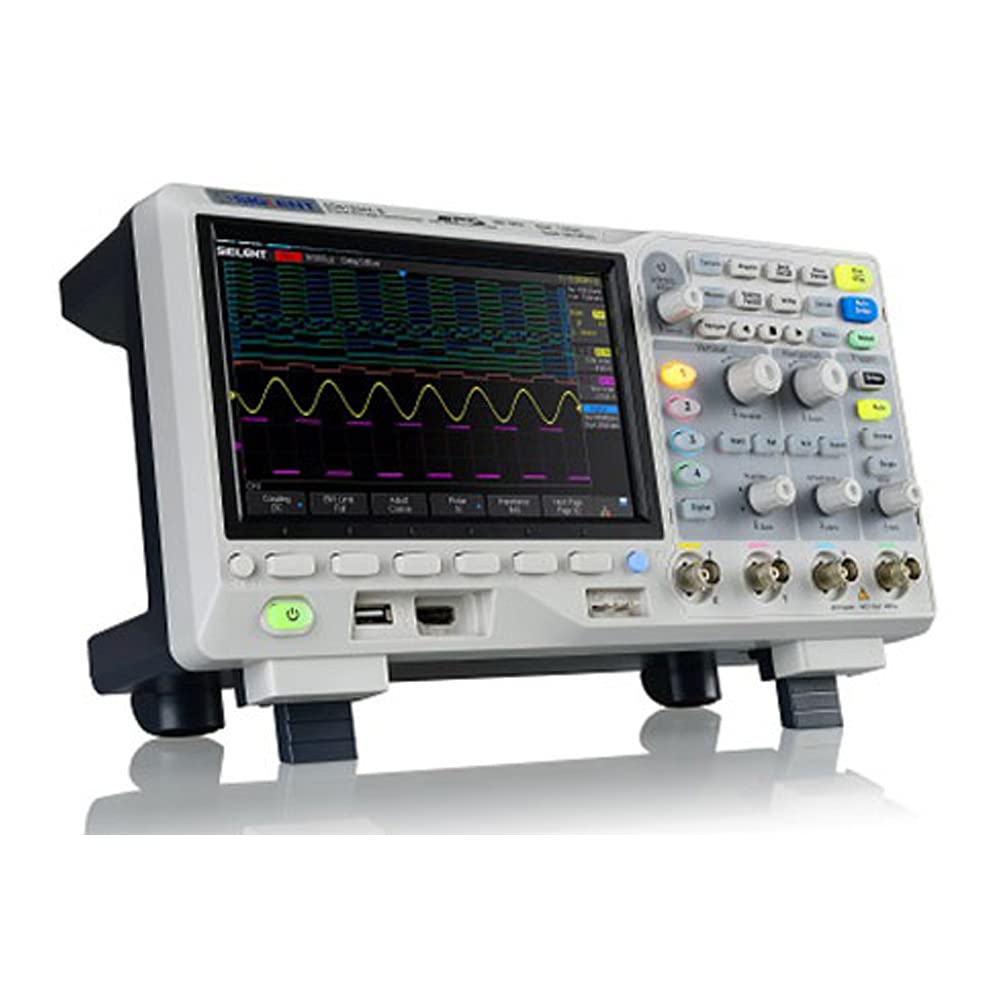
This four-channel oscilloscope delivers professional-grade features at a price point that makes it accessible for beginners who want room to grow.
Pros
- Serial bus decoding comes standard without requiring expensive add-ons or unlock codes
- The interface responds quickly without the lag I’ve experienced on competing models
- Captures waveforms at an impressive rate that helps catch intermittent signal issues
Cons
- The included probes are functional but you’ll likely want to upgrade them fairly quickly
- Loses the time setting every time you power it down
- Individual channel controls would be more convenient than the shared knob system
I found the display impressive when I first powered it on. The color temperature grading makes it easier to distinguish between frequent and rare signal events, which proved invaluable when tracking down glitches.
The FFT function handled frequency analysis better than I anticipated for this price range. I used it to diagnose some AC power problems, and the ability to trigger off the mains input made the whole process straightforward.
The serial decoding capability for I2C, SPI, UART, CAN, and LIN buses works right out of the box. Many manufacturers charge extra for these decoders, so having them included represents genuine value.
Build quality feels solid and the controls operate smoothly. After a year of regular use, I haven’t encountered any reliability issues. The Ethernet port adds flexibility for remote monitoring when needed.
The 256-level intensity grading helps visualize signal behavior patterns that would be harder to spot on basic scopes. Navigation through saved waveforms works intuitively, though I did need to reference the manual initially for some of the more advanced triggering modes.
Siglent SDS1202X-E
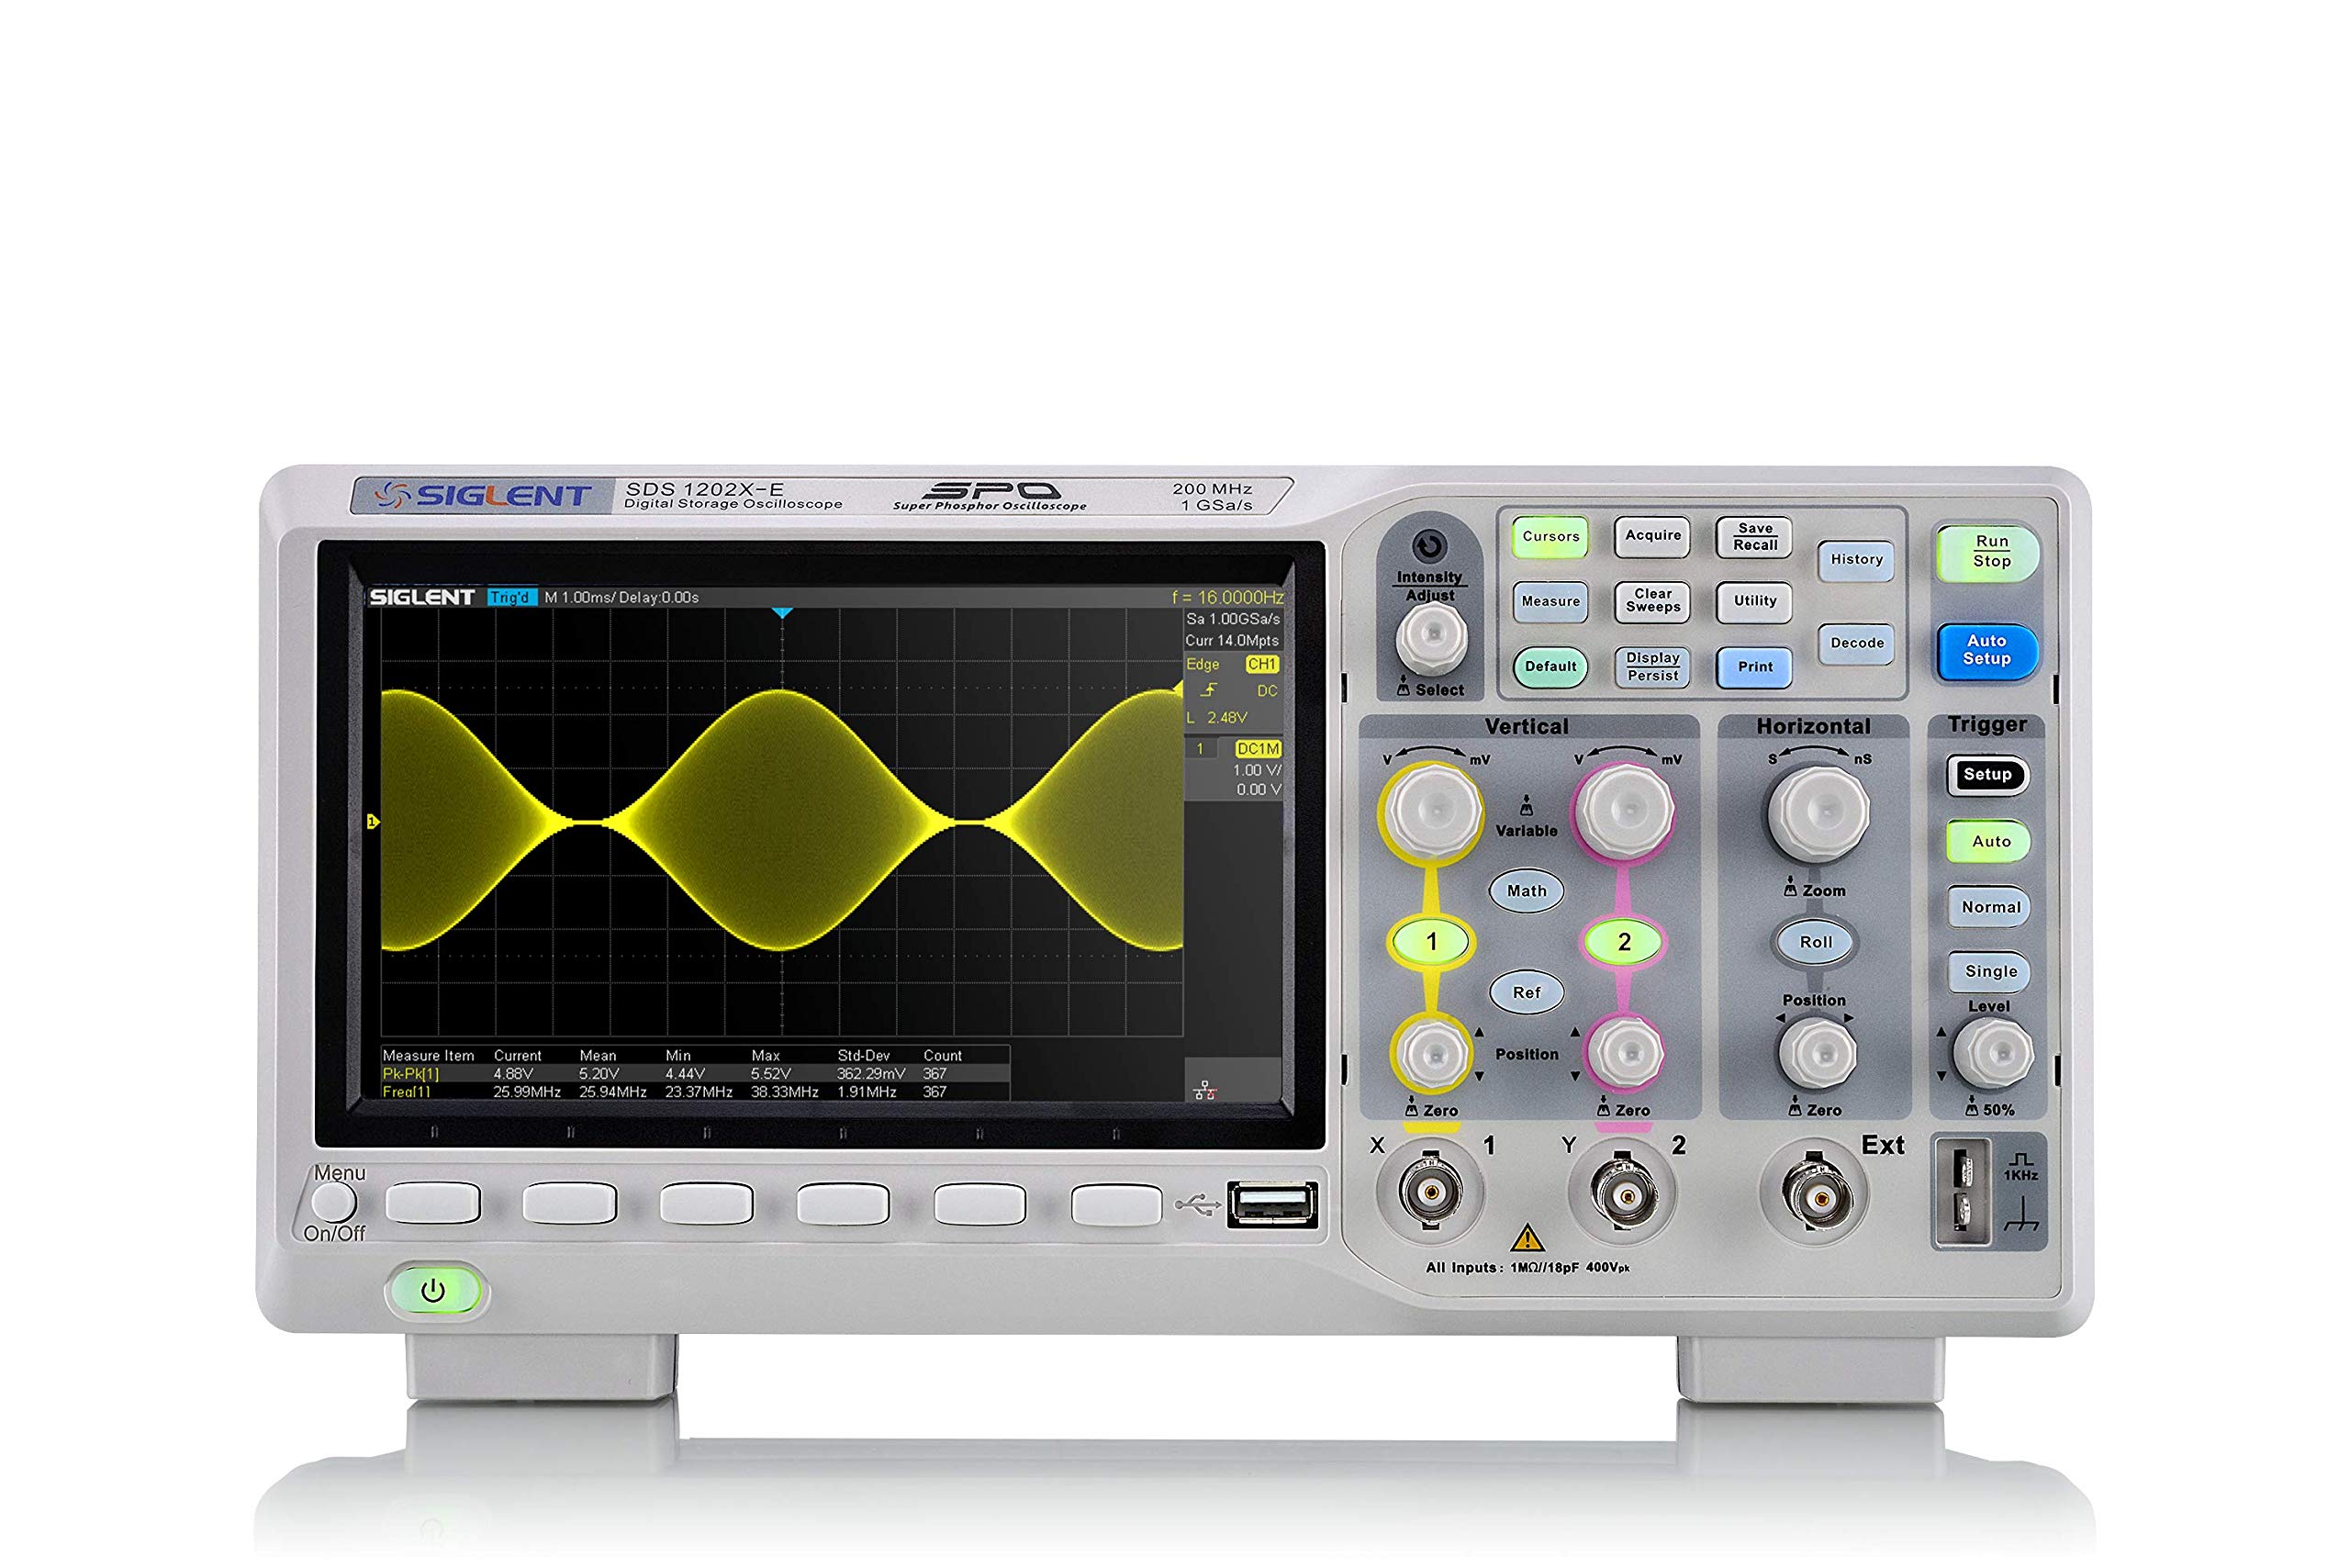
The Siglent SDS1202X-E delivers professional-grade features at a price point that makes it accessible for beginners who want room to grow without buying a second scope later.
Pros
- Built-in serial bus decoding for multiple protocols eliminates the need for expensive software add-ons
- The 256-level intensity grading shows signal details that other entry-level scopes miss completely
- Auto-adjust feature finds your waveform immediately instead of making you hunt for it
Cons
- The fan noise becomes noticeable during longer sessions in a quiet workspace
- Learning curve for the more advanced features requires time with the manual
- Physical size takes up more bench space than compact hobbyist models
I found the 200 MHz bandwidth more than adequate for my microcontroller projects and basic RF work. The display rendered waveforms clearly with excellent color separation between channels. When I tested Arduino serial communications, the built-in UART decoding showed me exactly what data was transmitting without needing a separate logic analyzer.
The record length of 14 megapoints captured long signal sequences that I needed to troubleshoot intermittent issues. Triggering proved sensitive and stable, even when working with noisy signals from motor controllers. I appreciated how the screen refreshed quickly during adjustments.
Using this scope felt more intuitive than I expected after working with older models. The knobs had good tactile feedback and the menu system made sense after minimal exploration. Math functions including FFT analysis worked smoothly for examining frequency content in audio circuits.
The 1 GSa/s sampling rate handled fast digital signals without aliasing problems. I tested it against waveforms from a CAN bus and the decoder accurately displayed every frame. Build quality felt solid with no flex in the chassis or wobbly controls.
Buying Guide
When I’m shopping for an oscilloscope, I start by determining my primary use case. This helps narrow down the specifications that matter most for my applications.
Bandwidth Requirements
I consider bandwidth first because it defines the range of frequencies the oscilloscope can accurately measure. For digital circuits, you will typically need at least five times the highest frequency in my signals.
Sample Rate
The sample rate determines how many data points the oscilloscope captures per second. Look for a sample rate that’s at least four times the bandwidth to ensure accurate waveform reconstruction.
Channel Count
How many signals do you need to observe simultaneously. Most beginners find two channels sufficient, but four channels provide more flexibility for complex circuit analysis.
Screen Size and Resolution
A larger display with higher resolution makes waveform analysis easier on my eyes. I prefer screens that clearly show multiple waveforms without crowding.
Key Features to Compare
| Feature | What To Look For |
|---|---|
| Memory Depth | Longer capture times at high sample rates |
| Trigger Options | Edge, pulse, and pattern triggers minimum |
| Interface | USB or Ethernet for computer connectivity |
| Probes Included | Quality passive probes rated for the bandwidth |
| Warranty | At least one year coverage |
Budget Considerations
Balance features against cost. Entry-level models work well for hobbyists and students, while professional work demands higher specifications.
Also check for firmware updates and manufacturer support before purchasing.
Frequently Asked Questions
Entry-level oscilloscopes require specific bandwidth and sample rate capabilities, while digital models offer distinct advantages over analog designs for learning. I recommend focusing on practical measurement techniques and proper calibration procedures.
What are the essential features to look for in an entry-level oscilloscope?
I prioritize bandwidth as the first specification to consider. For basic electronics work, 50-100 MHz bandwidth handles most beginner projects adequately.
Sample rate matters significantly for accurate waveform capture. I look for at least 1 GSa/s (gigasample per second) to ensure proper signal representation without aliasing.
The number of channels affects measurement flexibility. I recommend starting with a dual-channel oscilloscope to compare signals simultaneously, which proves essential for debugging circuits.
Screen size and resolution impact usability. I prefer models with at least a 7-inch display and clear waveform visibility for comfortable viewing during extended use.
How does a digital oscilloscope differ from an analog one for beginners?
Digital oscilloscopes convert analog signals into digital data for processing and display. I find they offer storage capabilities that analog models cannot provide, allowing me to capture and analyze waveforms later.
Analog oscilloscopes display signals in real-time using a cathode ray tube. The signal directly controls the electron beam, creating an immediate visual representation without conversion delays.
Digital models provide measurement automation, including voltage, frequency, and rise time calculations. Analog oscilloscopes require manual measurements using graticule markings on the screen.
Digital oscilloscopes support advanced triggering options and can capture single-shot or intermittent events. I use these features regularly for troubleshooting complex timing issues.
What basic measurements can be performed with an oscilloscope?
I measure voltage amplitude by examining the vertical distance between signal peaks. The oscilloscope’s voltage scale setting determines the actual voltage value per division.
Frequency measurements involve counting waveform cycles over time. I calculate frequency by measuring the period (time for one complete cycle) and applying the formula f = 1/T.
I use oscilloscopes to measure rise time, which indicates how quickly a signal transitions from low to high. This measurement typically spans from 10% to 90% of the signal’s amplitude.
Phase relationships between two signals become visible when I display multiple channels simultaneously. The horizontal offset between corresponding points reveals phase differences in degrees.
How can beginners calibrate an oscilloscope before taking measurements?
Start by powering on the oscilloscope and allowing it to warm up for 20 minutes. This ensures internal components reach stable operating temperatures for accurate measurements.
Most oscilloscopes include a calibration signal output, typically a 1 kHz square wave at known amplitude. I connect my probe to this output and adjust the probe compensation using a small trimmer capacitor.
Observe the square wave shape on screen. If you see overshoot or rounding, adjust the probe’s compensation screw until the waveform displays clean, flat tops and sharp corners.
Verify the ground connection by touching the probe tip to a known ground point. A flat line at zero volts confirms proper grounding and probe functionality.
What are some practical tips for making accurate voltage measurements with an oscilloscope?
Always use the correct probe attenuation setting (typically 10X) and ensure the oscilloscope’s menu matches this setting. Mismatched settings cause 10-fold measurement errors.
Ground lead length affects measurement accuracy significantly. I keep ground connections as short as possible, ideally under 2 inches, to minimize noise and ringing.
Adjust the vertical scale so the waveform occupies 50-80% of the screen height. This maximizes resolution and makes voltage measurements more precise.
When measuring DC voltages, switch the input coupling to DC mode. For AC signals riding on DC offsets, you can use AC coupling to remove the DC component and better visualize the AC waveform.
Verify measurements by using the oscilloscope’s automatic measurement functions rather than counting divisions manually. Automated measurements reduce human error and provide consistent results.